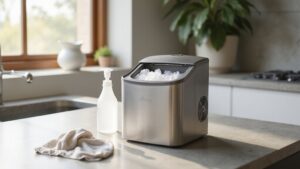
Keeping your countertop ice maker clean is key to ensuring it produces fresh, crisp ice and lasts longer.
Regular cleaning involves simple steps like emptying ice and water, washing removable parts, and descaling the interior.
With just a little time and effort, you can keep your machine operating smoothly and ice tasting great.
Below, you’ll find a straightforward guide to help you do just that.
Tools and Supplies You’ll Need (Vinegar, Brush, Soft Cloth)
To clean your ice maker effectively, you’ll need a few simple supplies: white vinegar, a soft-bristle brush or an old toothbrush, and a microfiber cloth. White vinegar serves as a natural descaler—mix it with warm water at a ratio of 1 to 10 for light cleaning or use equal parts for more thorough descaling. After soaking the parts for 15 to 20 minutes, use the brush to scrub tight corners and nozzles to remove built-up scale and grime. Wipe down interior surfaces with a microfiber cloth to prevent lint residue, then dry everything thoroughly with a clean towel. These tools make maintenance straightforward, and how often you clean—every one to three months—will guide your cleaning schedule. Don’t skip drying steps, as they help prevent odors and mold between cycles. For high-performance models, nugget ice makers often require extra attention to the ice bin and auger area during cleaning to maintain their signature chewable texture and prevent clogs. Following a routine schedule helps avoid costly breakdowns and keeps your machine running efficiently. The same cleaning solution used for descaling can also be applied to clean and soak the cold brew filter to remove stubborn coffee oils effectively.
Unplug, Empty, and Remove All Parts Before Cleaning
To prepare your ice machine for cleaning, start by unplugging the unit to ensure safety. Never clean a powered device to avoid electrical hazards. Once unplugged, empty all ice from the ice storage bin and discard it; do not save the leftover cubes. Next, drain the water reservoir completely at a sink to prevent any residual water from mixing with cleaning solutions. For detailed maintenance tips, refer to best countertop ice makers reviewed online. If the unit still fails to work after cleaning, a malfunctioning water inlet valve may need professional replacement. Finally, remove all detachable parts such as the ice basket, scoop, and drip tray. Checking your manual first is recommended since removable parts can vary by model. Unlike some countertop appliances, blenders rarely include glass pitchers in modern designs. With these steps completed, you can wash the removable components separately while leaving the main unit disconnected until cleaning is finished.
How to Wash Removable Parts (Basket, Scoop, Tray)
To wash the removable parts, including the basket, scoop, and tray, use warm, soapy water with a mild dish soap. Start by soaking these parts to loosen mineral deposits and stubborn residue. Use a sponge or soft cloth to gently clean all surfaces, paying special attention to crevices and grooves where grime can hide. For stubborn scale on the ice mold or water reservoir openings, a soft toothbrush works best. Avoid harsh scrubbing or abrasive cleaners, as these can scratch the plastic.
Rinse each part thoroughly with clean water until no soap smell remains; soap residue can impact the taste of your ice. Dry the parts completely with a lint-free towel or let them air dry before reassembling. Trapped moisture can lead to odors and buildup over time. Some baskets and scoops are dishwasher-safe on the top rack—check your manual—but using warm, soapy water is always a safe and gentle option. Never use steel wool or other abrasive tools on these delicate components.
Clean the Interior of Your Countertop Ice Maker
Unplug the countertop ice maker, empty any remaining ice and water, and fully expose the interior. Use the interior lighting to help spot grime and debris. Wipe down the ice mold, reservoir, and inner walls with a soft cloth dampened in mild detergent, paying close attention to corners and the ice chute. For tight spaces, use a small brush to scrub away buildup. Rinse all surfaces frequently to prevent spreading residue, then wipe again with a clean, damp cloth to remove soap film. Dry all components thoroughly with a microfiber towel. Leave the lid open for a few moments to allow moisture to escape before plugging the unit back in. For a more thorough approach, consider using custom paper cup materials and techniques to protect surfaces from scratches during cleaning. Once clean, you can run a vinegar solution through a cycle to sanitize the internal pathways and dissolve mineral deposits. Before deep cleaning, check if the line has frozen water blockages to avoid damaging internal components.
Descale Mineral Buildup in Your Countertop Ice Maker
To descale your countertop ice maker, start by turning off the unit, draining the reservoir entirely, and removing any existing ice. Fill the reservoir with a descaling solution recommended by the manufacturer or use a food-grade alternative such as diluted vinegar or citric acid. Run a cleaning cycle to circulate the solution through the system. If mineral deposits are heavy, let the solution sit and soak for several minutes for light scale, or overnight for stubborn buildup. Avoid using overly strong acids, as they can damage seals and components. After soaking, drain the solution completely and flush the system with fresh water multiple times until no residue remains. Performing this cleaning process once a month is beneficial in areas with hard water. To minimize future scale formation, use distilled or softened water between descaling treatments and always wear gloves and ensure good ventilation during the process. Carefully remove all cleaning solutions before reinserting ice and resuming regular use.
Sanitize Your Countertop Ice Maker After Descaling
After descaling your countertop ice maker, thoroughly sanitize it to eliminate any bacteria or biofilm residues. Start by mixing a food-safe sanitizer, such as one teaspoon of unscented bleach per gallon of cool water. Fill the reservoir with this solution and run a full cycle, allowing the liquid to circulate for at least ten minutes. This process disinfects internal lines, pumps, and the ice bin, helping to keep your ice hygienic. Remember to also sanitize removable parts like the scoop and basket separately. Regular sanitization can also help prevent loud noises caused by mineral buildup or blockages in the system.
Once the sanitizing cycle is complete, discard all ice produced during the process. Rinse the system thoroughly with fresh water through several rinse cycles until there is no trace of chlorine. Proper rinsing is essential to remove mineral residues from water hardness and any remaining sanitizer. Avoid mixing sanitizer with descaler residues, and use only the recommended concentrations to prevent damage to the unit’s parts.
Dry Every Surface Fully to Prevent Mold and Odors
After sanitizing, it is crucial to dry every surface thoroughly to prevent mold and odors. Use a clean towel to wipe down the ice maker drain, interior vents, and all corners, paying close attention to seams and crevices where moisture can hide. Remove the basket, scoop, and cover, and dry each component completely on a clean surface. Leave the lid open to air-dry for at least 24 hours before reassembling or storing the unit. Inspect the ice maker drain and interior vents for any residual droplets. Only reassemble once every part feels entirely dry. Ensuring your machine is fully dry inhibits trapped moisture, which can lead to unpleasant smells or bacterial growth. Skipping this step can compromise the freshness and safety of your ice and leave lingering odors. For instance, a leaking water line can introduce excess moisture that makes thorough drying even more critical. When water passes through a built-in filter, contaminant removal can affect how quickly surfaces re-wet and how thoroughly they need to be dried. For best results, perform a deep clean of the water line every six months to prevent mineral buildup and bacteria.
3 Weekly Habits to Extend Your Ice Maker’s Life
Regular weekly maintenance is key to extending your ice maker’s lifespan. First, drain the reservoir and replace the water completely rather than just topping it off. This prevents stale buildup and mineral deposits that can cause off-flavors and reduce efficiency. For context, a jigger of vodka contains roughly 97 calories, which is comparable to the hidden energy cost of neglecting mineral buildup. Second, clean the ice basket and scoop with warm, soapy water each week. Rinse thoroughly to avoid soap residue contaminating your ice. For a durable alternative, consider a model with a thermal carafe that keeps beverages hot without electricity, similar to how a well-maintained ice maker preserves cold. Third, inspect the reservoir and water-contact areas for scale or chalky deposits, especially if you live in a hard-water area. Using filtered water can slow down mineral buildup and help prevent future troubleshooting issues. Also, wipe down the exterior, control panel, and lid edges regularly to remove spills, dust, and grime. Keeping vents clear for proper airflow, checking for unusual noises, and noticing if ice production slows down early are also part of routine maintenance. These simple weekly habits help keep your ice maker working smoothly and extend its overall lifespan. Selecting a model like a top-rated Boston shaker can offer similar value and durability in your bar tools.