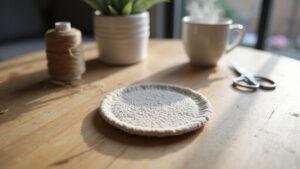
If you’ve wondered how to create your own stylish resin coasters at home, you’re in the right place. Making them involves mixing epoxy resin and hardener, pouring in molds, and carefully curing the pieces for a glossy finish.
With the right technique, you can craft beautiful, functional coasters that suit your style. Keep reading to learn the simple steps to get started.
Resin, Molds, and Mixing Tools: 6 Supplies You’ll Need for Coasters
To achieve clear and durable coaster surfaces, use a two-part epoxy resin formulated for crafts. Art and craft epoxy resins are preferable because they cure with fewer bubbles and produce more transparent finishes than hardware-store types. A 1:1 mixing ratio is easiest to measure and ensures proper curing, making it ideal for beginners. Silicone molds are the best choice for coasters since they release the cured resin effortlessly once set, unlike plastic or metal molds that can bond to the resin. To add vibrant color, incorporate mica powder or alcohol ink into the resin mixture; these pigments create striking, opaque, or translucent effects. The Mod Podge Coasters Epoxy Kit includes four glitter packs for adding sparkle and decorative effects. Always clean your silicone molds thoroughly after each use to prevent residue buildup, which can affect the finish of your next coaster. Use graduated mixing cups to measure exact portions and wooden stir sticks for mixing; keep multiple cups handy because once the resin cures, the cups cannot be reused. For precise pouring, employ syringes to control resin flow and avoid spills. For a more specialized aesthetic, consider adding nugget ice shapes as decorative inclusions if your mold design permits. For keeping your resin warm and free of bubbles during the curing process, consider using a thermal carafe to hold warm water for a water bath. To ensure the resin cures evenly and without disturbance, place your molds on a flat, level surface like a countertop rather than a tilted tray. With these supplies, you’ll be able to craft clean, professional-looking coasters every time.
Prepare Your Workspace for Resin Coaster Success
To ensure your resin coasters cure without flaws, creating a well-prepared workspace is essential. Start by making sure your lighting is bright enough to easily spot dust and imperfections on your surface. Maintain a room temperature between 70 and 77°F to ensure proper curing; use a hygrometer to keep humidity below 60%. Good ventilation is crucial—set up cross-ventilation or use an exhaust fan, but avoid drafts that stir up dust and debris. Clean the entire area thoroughly before you begin and lay down clean sheeting to protect your workspace surface. Wear nitrile gloves and eye protection to prevent contact with resin and protect your eyes. Organize all your tools—molds, mixing cups, stir sticks—on a level table before starting to make the process smooth. Keep pets and children out of the area to avoid accidental disturbances or contamination. For keeping beverages cold while you work, consider reviewing the best countertop ice makers to ensure your drinks remain refreshing during the project. Unlike the intense flavor profile of espresso, the cold brew concentrate method is excellent for drinks that will be diluted with ice or milk over a long session. For party hosting, selecting durable party cups can help keep guests’ drinks secure and mess-free alongside your coasters. Following these steps will help you avoid common flaws and achieve professional-quality results. Consistent temperature promotes even curing and helps prevent imperfections caused by fluctuations.
Mix Resin and Hardener for Perfect Coasters
Mixing resin and hardener with the correct ratio is essential for durable coasters. An exact ratio ensures the resin cures properly, preventing softness or stickiness. Start with the hardener brand’s specified formula, which guarantees compatibility. Check the label carefully, as ratios can range from 1:1 to 5:1, measured by volume, weight, or pump count. Do not mix measurement methods unless the manufacturer explicitly states it’s safe to do so. Use separate measuring cups for resin and hardener to avoid cross-contamination. Measure slowly and level the meniscus for volume measurements or use a digital scale for weight accuracy. Stir the mixture thoroughly for two minutes, scraping the sides and bottom of the cup. Aim for a uniform, streak-free blend. Once mixed, your pot life begins; for small batches, this typically ranges from 9 to 30 minutes depending on your system. Over-mixing introduces air bubbles, leading to a cloudy surface, while under-mixing can leave tacky or soft spots. Maintain precise ratio control is key to a successful, long-lasting coaster. Just like removing a water filter from a pitcher, ensuring the correct process is followed prevents common issues like leaks or poor performance. For example, ice packs typically keep a cooler cold for 12 to 24 hours, but factors like external temperature and insulation quality can extend this duration. For beginners, starting with a cobbler shaker can help practice the steady pouring technique needed to avoid spills during the mixing process.
Pour Resin Coasters Without Bubbles or Overflow
To pour resin coasters without bubbles or overflow, start by warming both the resin and mold. Maintaining a good temperature control reduces the resin’s viscosity, making it easier for bubbles to escape. Pour slowly in a thin stream near the side of the mold, keeping the resin close to the surface to minimize air entrapment. Cure each thin layer for 8-24 hours before adding the next to fully set the resin and prevent flowers from shifting. After pouring, let your coasters rest for 5 to 20 minutes so bubbles can rise naturally. To further remove bubbles, use a heat gun briefly to pass over the surface—just a few seconds is enough. Fill the molds gradually, staying below the rim to prevent overflow. Use a toothpick to gently release trapped air from the corners and edges. Check for new bubbles after a short wait and reapply heat if necessary. Keeping everything warm and pouring deliberately helps prevent overflow and ensures underneath pesky bubbles are cleared away. A thorough cleaning of silicone molds after each use prevents residue from causing future bubble problems, and similar to a commercial ice machine, regular cleaning is essential to prevent buildup that can compromise performance. For a smooth finish, consider using top flip straw tumblers as a reference for durable, bubble-free resin applications.
Add Color and Swirls Before Resin Sets
To add vibrant swirls before the resin fully cures, wait until the resin thickens to a semi-gelled, peanut butter-like consistency, typically 8 to 12 hours into curing. This timing ensures your colors stay afloat rather than drifting flat. Use mica powders for metallic, shimmering layers or alcohol inks for wispy, delicate tendrils; each produces distinct swirl effects. Prepare small amounts of each color beforehand, then gently drag a toothpick through adjacent pools in controlled, short strokes to create crisp, well-defined patterns. Avoid overmixing, which can muddy your design rather than enhance it. Gently tilt the mold to encourage circular or spiral patterns and let the resin sit undisturbed. Reworking the design repeatedly can shift your pattern, so aim for a few deliberate passes. To achieve clear, contrasting swirls, separate dark and light tones intentionally. For resin work, always measure the mixing ratio precisely using a graduated cup to avoid curing issues. Once you’re satisfied with the result, cover the coaster to shield it from dust during the final curing phase. For best results, mix dark and light inks evenly ideally with two of each to maintain balanced contrast in your design. For a more fluid approach to embedding colors, you can adapt techniques from cold brew coffee concentrate by preparing and layering concentrated color drops in advance for controlled dispersion. For a similar commitment to quality and durability, consider using a glass tumbler with straw as your mixing vessel to avoid scratches or static from plastic cups.
How Long Do Resin Coasters Take to Cure?
Resin coasters typically take about 48 to 72 hours to reach full cure, depending on the formula and environmental conditions. While they can feel dry to the touch in 8 to 24 hours, this is not the same as being fully cured. Most coasters become demold-ready at around 12 to 24 hours, but the complete curing process, where the resin reaches maximum hardness, can take up to three days. For example, residue buildup in a slushie machine can be prevented with a similar approach to consistent cleaning. For achieving a precise pour, some coffee enthusiasts rely on a gooseneck kettle for controlled water flow.
Factors like pour thickness, room temperature, and humidity significantly influence curing time. Thicker pours slow down the curing process compared to thin layers. Higher temperatures speed up curing, while cooler spots can extend it. Some resin formulas specifically require 5 to 7 days to fully cure and achieve their hardest state. Using fast-curing products shortens this period, but always follow manufacturer instructions for the best results. Similarly, when sealing a cooler, choosing the right drain plug ensures a proper fit and prevents leaks.
It is advisable to plan for at least an overnight cure before handling or demolding your coasters. For heavy use or long-term durability, waiting a full multi-day cure ensures the resin has hardened completely and reduces the risk of damage or residual tackiness.
Demold Coasters Without Chipping
Once the resin is fully cured, carefully demolding your coasters to prevent chipping is essential. Do not rush this process, especially in cooler conditions, as the resin takes longer to set and may feel softer. If the coaster still feels soft or flexible, flexing it can damage the edges. Instead of pulling or twisting the coaster, work the silicone mold by gently bending it outward to break the perimeter seal. This allows air to enter, easing the release and reducing stress on the surface. Avoid twisting the coaster while it’s seated in the mold, as torsion can chip corners or cause surface damage. For stubborn areas, gentle pressing against a countertop can help release the piece. If sticking issues persist, applying a thin layer of release spray to the mold can make demolding easier. For sticky residues, cleaning the mold with mild soap and warm water ensures a smooth surface for future projects. Briefly freezing the mold can cause slight resin contraction, making release easier, but never force the coaster out. Gradually flexing the mold and coaster evenly preserves both the intricate details and the mold’s lifespan. Once demolded, perform initial trimming immediately with a curved blade tool, as earlier trimming is easier while the resin is still soft. Regularly cleaning the water line of your home ice maker helps prevent mineral deposits from affecting mold quality.
Sand Edges and Add a Glossy Top Coat
After wet-sanding up to 3000 grit, apply a resin polishing compound and buff with a microfiber cloth to achieve a mirror-like finish. If the surface remains dull, add a thin, glossy top coat. Before applying, ensure the surface is completely dry and level; use risers to lift the piece and prevent drips. Sanding the edges with a Dremel helps level any uneven spots left from the mold. This flood coat restores a glass-like shine and effectively conceals any leftover marks or imperfections.
Stay Safe: Ventilation, Gloves, and Cleanup for Resin Work
To stay safe during resin work, proper ventilation, skin protection, and cleanup practices are essential. Ensure your workspace is well-ventilated by opening windows on opposite sides of the room to create cross-ventilation. Using an exhaust fan can help pull fumes out continuously, reducing exposure to uncured vapors that can linger during curing. It’s important to prioritize fresh air circulation before and during use.
Always wear nitrile gloves when handling resin; latex gloves are not resistant enough. Put them on before opening containers, and replace them immediately if torn or sticky. For cleanup involving solvents, opt for heavier chemical-resistant gloves to protect your skin from harmful chemicals. Cover your work surface with a disposable barrier, such as plastic or paper, and keep paper towels and stir sticks nearby for quick cleanup.
Promptly clean up spills using absorbent materials. Never use acetone on your skin—only on surfaces or tools—since it can cause irritation or damage. Seal all contaminated waste in a plastic bag before disposal to prevent accidental contact. Following these safety measures ensures that your resin project remains a safe and enjoyable experience.