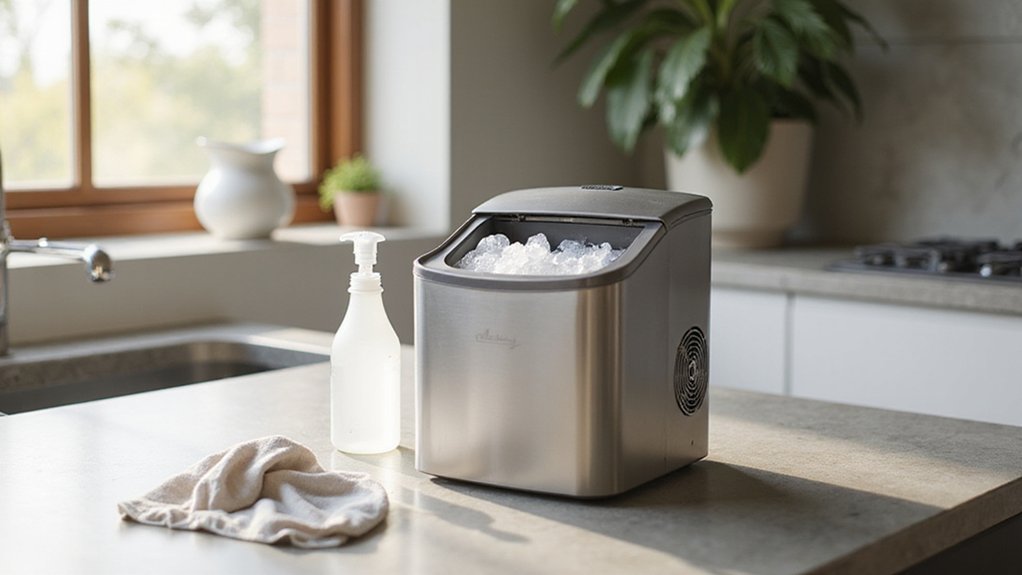
Cleaning your portable ice maker may seem like a small task, but it’s key to keeping your ice fresh and the machine running smoothly. Regular upkeep can prevent mineral build-up and ensure your ice tastes just right.
In this article, you’ll learn a simple, step-by-step method to clean your unit thoroughly and efficiently.
Keep reading to discover how to maintain your ice maker with confidence.
Why Clean Your Ice Maker Regularly?
Regular cleaning is essential because mold and bacteria thrive in the moist, enclosed environment of your portable ice maker. If you don’t clean it regularly, slime can form in the reservoir, bin, and tight crevices. Frequent cleaning not only removes visible slime but also prevents its regrowth, keeping your unit hygienic and working efficiently. It minimizes bacterial and pathogen buildup since ice comes into direct contact with surfaces that may harbor contaminants like drain pans and chutes. For commercial units, neglecting this can lead to health code violations, so following a strict schedule is equally important for hygiene. Additionally, maintaining high hygiene standards is especially critical for producing nugget ice for perfect chill in drinks.
Cleaning also improves ice quality — enhancing taste, smell, and appearance — by removing mineral deposits and residue that can cause off-flavors and odors. Using specialized cleaning tools such as brushes and descaling solutions simplifies this process. A common and effective cleaning method involves using a vinegar solution to dissolve hard-water scale, protecting the machine’s performance. Regular upkeep prevents scale buildup, prolongs the lifespan of your appliance, and helps avoid costly repairs. For best results, you should deep-clean the unit every few months to thoroughly sanitize all components and prevent hidden slime in tight crevices.
Unplug and Drain Before Cleaning
To safely clean your portable ice maker, always unplug it and drain all standing water before starting. Unplugging the unit is essential to eliminate the risk of electric shock while handling water. Locate the drain plug or cap—typically found on the back, bottom, or side—and position the machine over a sink or bucket. Twist off or pull out the drain plug to empty the reservoir completely. If no drain cap exists, tilt the unit gently to drain the water. Keep the appliance unplugged throughout this process to ensure safety. This ensures no water gets into moving parts, similar to the easy-clean approach found in top cooler igloos that prioritize hassle-free maintenance. After draining, reattach the drain plug securely. This initial step ensures there is no power or standing water in your machine, setting a safe foundation for the cleaning process. For best results, use a mild cleaning solution to avoid damaging internal components. While cleaning, you can use a jigger to measure precise amounts of cleaning solution, ensuring consistent dilution for each cleaning cycle.
Remove and Wash the Ice Basket and Scoop
The ice basket and scoop need a separate cleaning because they come directly into contact with your ice, and any residue or bacteria there can end up in your drink. To clean them, start by lifting the ice basket straight up and out of the unit. Remove the scoop at the same time if it’s clipped inside, and check for leftover ice to prevent spills. Handle plastic parts gently to avoid cracking.
Wash both with warm, soapy water using a soft sponge. Avoid using harsh abrasive pads that could scratch the surfaces. When cleaning the scoop, make sure to scrub the handle and corners thoroughly. Rinse both under clean running water until no suds remain, as leftover soap can affect the taste of your ice. Dry completely with a lint-free towel, paying close attention to seams and openings. Never return damp accessories to the unit. Regular cleaning of the ice basket and scoop helps prevent film buildup and off-tasting ice. Following the same principle as cleaning a margarita machine, always ensure all removable parts are fully dry before reassembly to avoid mold growth. For the best drinking experience, consider storing your ice in high-quality paper cups that are designed to maintain temperature and prevent leaks. Using a vinegar solution periodically can help remove mineral deposits from the interior components.
Best Way to Wipe Down the Interior Reservoir
Unplug the portable ice maker and fully drain any standing water through the drain cap before wiping down the interior reservoir. Keep the lid open to make access easier. Use a soft cloth or sponge dampened with warm water or a mild, soapy solution to clean the reservoir interior thoroughly. Gently scrub the bottom, side walls, and the underside of the lid, paying close attention to corners and crevices where slime and residue tend to accumulate. Apply light pressure to prevent scratching the plastic surfaces. Unlike Vitamix glass pitchers, plastic reservoirs require careful handling to avoid scratching. After cleaning, fill the reservoir with clean water, swish it around to rinse, then drain completely. Repeat this process if you notice any soap smell remaining. Use a towel to dry all reachable surfaces carefully. Leave the lid open to allow full air-drying, and make sure everything is completely dry before you start making ice again. Proper interior cleaning helps prevent build-up and ensures fresh-tasting ice. For persistent stains or discoloration, consider using a non-abrasive cleaning pad similar to those recommended for gentle removal of sublimation ink from tumblers. To fully eliminate mold spores, always finish by wiping all interior surfaces with a diluted white vinegar solution before the final rinse.
Best Cleaning Solution for Descaling
For descaling, match your solution to the severity of mineral buildup. For light film or odor, a 1:1 mixture of white vinegar and water is effective. This solution is gentle, inexpensive, and easy to prepare. For moderate deposits, citric acid—about two tablespoons per liter of warm water—provides a stronger, DIY alternative that tackles more stubborn deposits. When selecting a descaling solution, read the product label to confirm it is safe for plastic and metal components.
When facing heavy buildup or stubborn crust, commercial descaling products designed for appliances like ice makers offer the best performance. These products outperform vinegar and citric acid, breaking down calcium and mineral deposits more efficiently. Always opt for manufacturer-approved cleaners when available to avoid damage and ensure safe operation. Choosing a plastic-free electric tea kettle can help reduce potential chemical interactions from heated plastic components during the descaling process.
Avoid using concentrated vinegar, as it can corrode internal parts over time. Instead, dilute vinegar appropriately and follow recommended usage instructions. In hard-water areas, mineral deposits tend to form more quickly, so increase the frequency of descaling and adjust your solution strength accordingly. For a milder option, lemon water can be used periodically, but it is not as effective as dedicated descalers for removing heavy scale. For those who also own a coffee maker, thermal carafe models require similar care to prevent mineral buildup from affecting performance.
Run a Deep Clean Cycle (Here’s How)
To run a deep clean cycle on your machine, start by ensuring it’s prepped and the cleaning solution is properly mixed. Then, press and hold the Clean button for three to six seconds; you’ll see “CL” or a flashing light indicating the cycle is ready to begin. The cycle generally takes around 30 minutes, though some units can take up to 70 minutes. During this time, do not open or move any parts to avoid disrupting the process. Use a ratio of 1/10th vinegar to water (or 1/5th if heavily soiled) for the cleaning solution. For ice cube trays, a mild soapy sponge is sufficient, but abrasive cleaners should be avoided to prevent scratching the surface. Following these steps ensures proper sanitation of the internal components. For best results, keep the machine’s water reservoir ice cold during cleaning to mimic the same conditions that extend ice longevity in a cooler.
Once the cycle completes, drain the cleaning solution completely by unscrewing the drain nut or unplugging the cap to empty everything out. If heavy scale buildup remains after the first cycle, repeat the process. The frequency of this cleaning depends on how often you use the machine, but incorporating it into your monthly maintenance routine helps prevent mineral and scale buildup. After draining, refill the unit with fresh water only, then reassemble all covers or curtains before making ice again. Always follow your manual’s specific timing and button instructions for best results.
Why You Must Rinse Twice (and How to Do It Right)?
You must rinse twice after cleaning to effectively remove residues from vinegar, lemon juice, or descalers. These residues can linger in the reservoir, tubing, and evaporator, and if left behind, will transfer into your ice, affecting its taste and smell.
Start the first rinse by filling the reservoir with fresh water and running a full ice-making cycle. Discard all the ice and water produced during this cycle. If you notice any lingering odor, don’t stop there. Drain the reservoir completely, then refill it with clean water for a second rinse. Run another full cycle and discard this batch as well. Test the ice for neutral taste and smell. If chemical hints remain, repeat the rinsing process until your ice tastes clean. Always drain fully between rinses and avoid reusing water. Proper rinsing is essential and requires patience—shortcuts won’t do here.
Dry Surfaces After Cleaning to Prevent Mold
After cleaning, drying all surfaces thoroughly is essential to prevent mold growth. Immediately wipe the exterior, lid, controls, and seams with a dry towel, paying close attention to corners and crevices where water tends to trap. Leaving the lid open allows internal areas to air-dry completely. Surface drying isn’t enough on its own; you must also remove any residual water from the reservoir, drain areas, and lower pockets since hidden moisture can quickly lead to mold. Remove parts like trays, baskets, and seals, then dry them separately on a clean towel. Only reassemble once every component is completely dry. Store the unit in a dry location, away from humidity. Regularly drying your appliance after each use is the best way to keep mold and odors from developing over time. If you plan to transport the ice maker to a theme park like Disney World, be aware that hard-sided coolers are generally allowed and a safer option for keeping components dry.
How Long to Dry Before Reassembling?
You should wait at least 24 hours before reassembling. This allows sufficient time for the interior and all removable parts to fully air-dry and prevents moisture from causing mold or mildew. If your manual recommends a longer drying period, such as 48 hours before moving the unit, follow that guidance instead. For optimal results, consider using a premium champagne bucket to ensure your beverages stay perfectly chilled during the drying process.
Ensure every surface feels completely dry to the touch before reassembling. Check corners, seams, and crevices for any trapped moisture. Use a lint-free cloth to wipe away visible water, then leave the lid open in a well-ventilated area. If you notice residual dampness, extend the drying time further. The key is to be patient—fully dry surfaces ensure safe reassembly and maintain the unit’s longevity.
Keep It Clean: A Quick Maintenance Schedule
Regular maintenance is key to keeping your ice maker in optimal shape. Start with weekly tasks: empty and refresh the water reservoir, inspect the ice bin for clumping or debris, and clean the scoop. These simple steps help control mineral buildup and reduce the frequency of deep cleaning.
Your water hardness influences how often you need to perform descaling. Hard water causes scale buildup faster, so you should clean your machine every one to three months instead of every three to six months. Pay attention to signs like off-tasting ice, low ice production, or cloudy cubes, and clean immediately if they appear. Remember to clean your ice maker after long periods of storage or the first time you use it in a season to ensure fresh, clear ice year-round.